🏰 Minecraft Automated Castle Gate: Ultimate Redstone Fortress Entrance Guide
Want to build the ultimate Minecraft Automated Castle Gate in your survival world? This incredible redstone creation transforms a simple castle entrance into a fully automated fortress checkpoint. Instead of relying on basic wooden doors, a Minecraft Automated Castle Gate uses pistons, gravel, fences, and hidden redstone circuits to create a massive moving wall that opens and closes with the press of a button.
Whether you’re building a medieval kingdom, PvP stronghold, or mega-base, this Minecraft Automated Castle Gate adds security, realism, and an epic cinematic entrance to your build.
SUBMIT YOUR MINECRAFT SEEDS TO GET FEATURED HERE!
🔥 Why Build a Minecraft Automated Castle Gate?
⚡ Hands-Free Opening
No more stopping to open and close doors. Your Minecraft Automated Castle Gate opens automatically with the push of a button.
🛡️ Maximum Security
Unlike traditional doors, this Minecraft Automated Castle Gate uses solid moving blocks that help keep hostile mobs away from your fortress.
🏰 Perfect for Large Castles
Massive castle builds deserve massive entrances. A Minecraft Automated Castle Gate provides the grand appearance every fortress needs.
🎨 Hidden Redstone Design
All the wiring stays underground, making your Minecraft Automated Castle Gate look clean and professional.
📦 Materials Required for Minecraft Automated Castle Gate
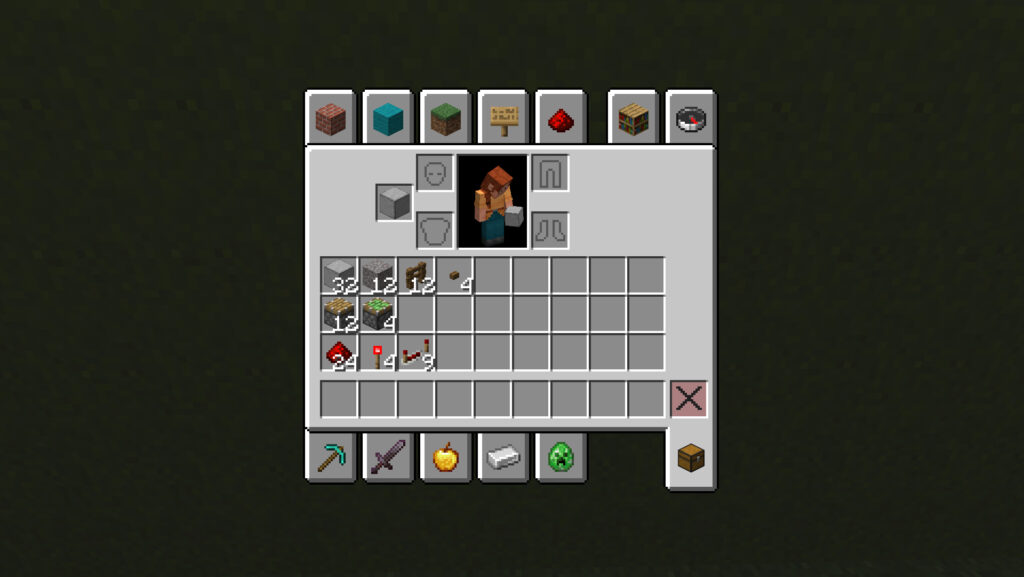
| 🧱 Material | 🔢 Quantity |
|---|---|
| Building Blocks | 32 |
| Gravel or Sand | 12 |
| Pistons | 12 |
| Sticky Pistons | 4 |
| Redstone Dust | 24 |
| Redstone Torches | 4 |
| Redstone Repeaters | 9 |
| Wooden Fences | 12 |
| Buttons / Pressure Plates | 4 |
🏗️ How to Build a Minecraft Automated Castle Gate
⛏️ Step 1: Dig the Hole
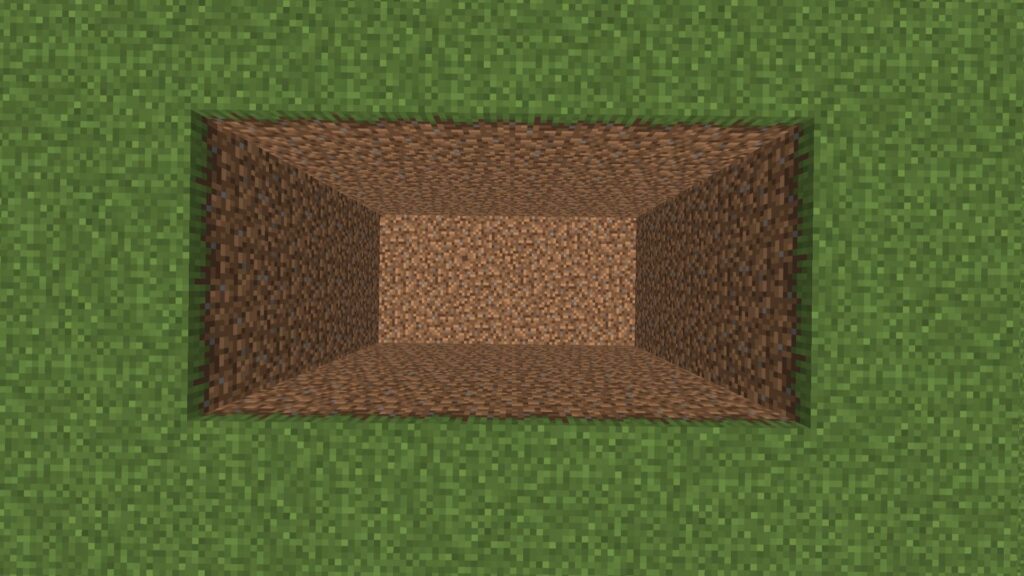
The foundation of your Minecraft Automated Castle Gate begins with a large underground chamber that will hide the entire redstone system.
📋 Instructions
✅ Find a flat grassy area.
✅ Dig a rectangle 6 blocks long and 3 blocks wide.
✅ Continue digging until the hole is 5 blocks deep.
📏 Dimensions
- Length: 6 Blocks
- Width: 3 Blocks
- Depth: 5 Blocks
🟢 Step 2: Place Sticky Pistons
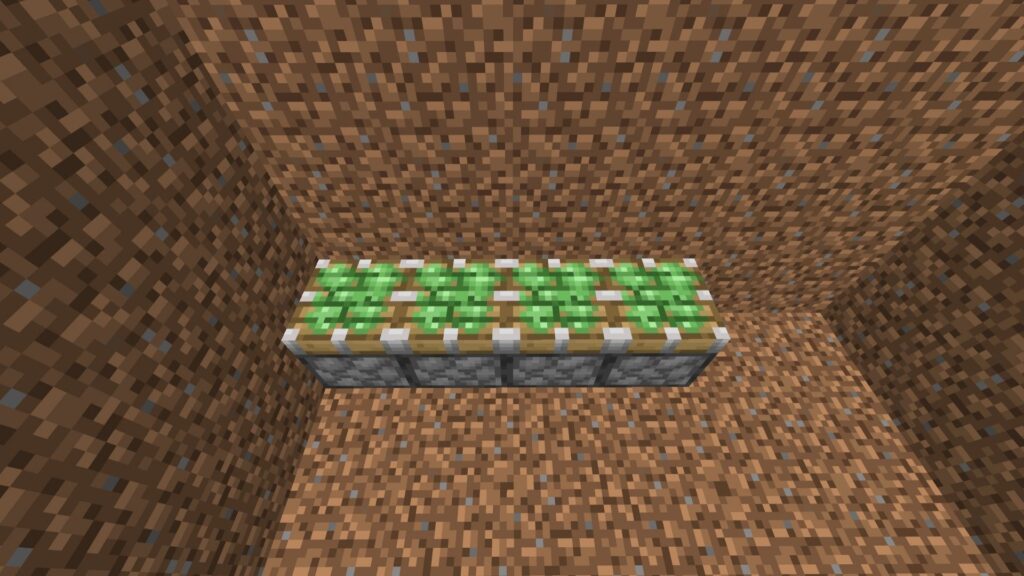
Sticky pistons form the core lifting mechanism of your Minecraft Automated Castle Gate.
📋 Instructions
✅ Go to the bottom of the hole.
✅ Place 4 sticky pistons in a straight line.
✅ Leave a 2-block gap on the right side.
✅ Make sure the sticky faces point upward.
📏 Dimensions
- Sticky Pistons: 4 Blocks
- Right Gap: 2 Blocks
⚙️ Step 3: Place Regular Pistons
Regular pistons provide additional lifting power for the gate structure.
📋 Instructions
✅ Place 4 regular pistons directly on top of the sticky pistons.
✅ Ensure they line up perfectly.
✅ Make sure all piston heads face upward.
📏 Dimensions
- Bottom Layer: 4 Sticky Pistons
- Top Layer: 4 Regular Pistons
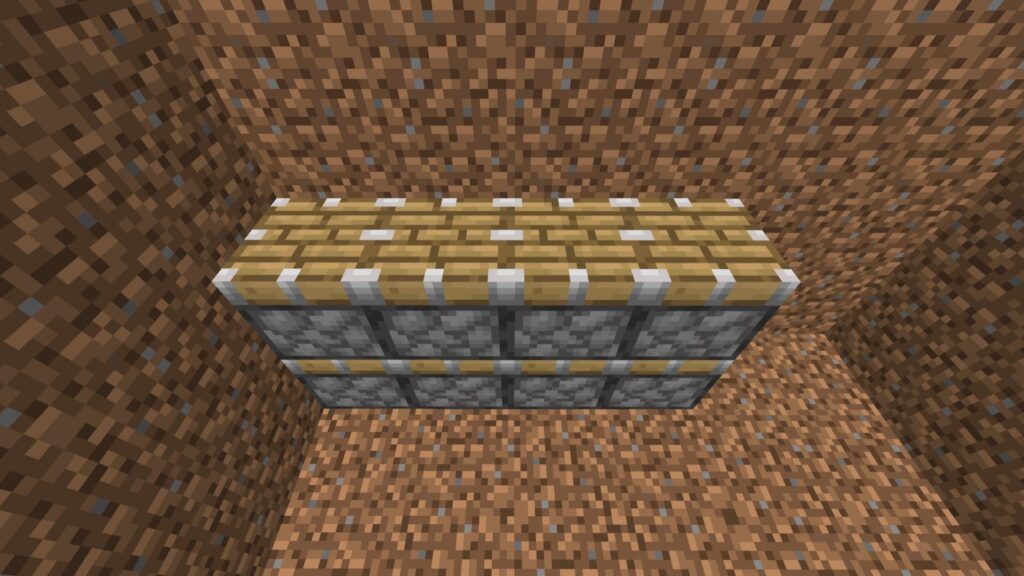
⛰️ Step 4: Place the Gravel Layers
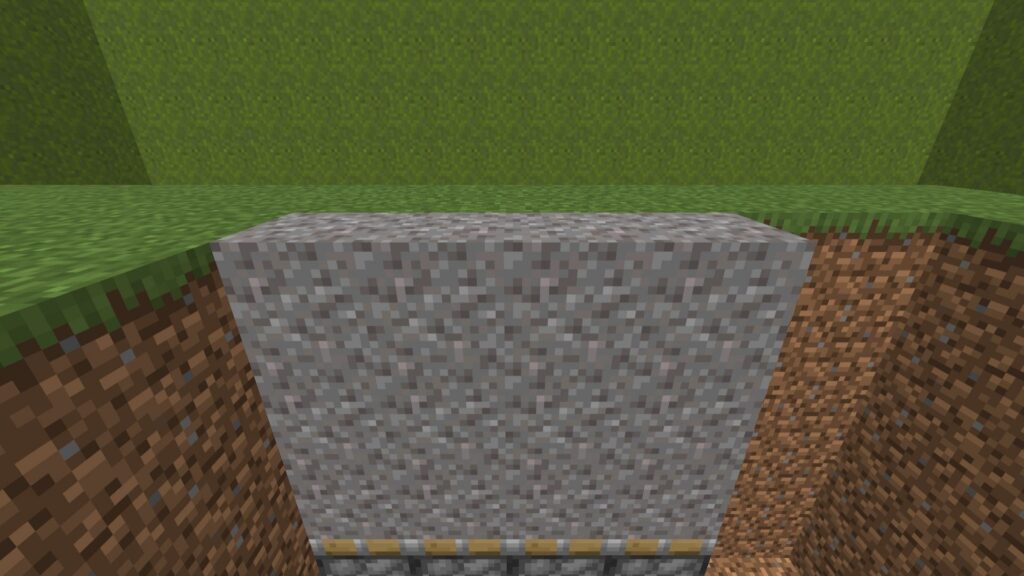
The gravel serves as part of the moving gate mechanism in your Minecraft Automated Castle Gate.
📋 Instructions
✅ Place 4 gravel blocks on top of the pistons.
✅ Add a second layer of 4 gravel blocks.
✅ Add a third layer of 4 gravel blocks.
✅ Ensure the top layer is level with the surrounding ground.
📏 Dimensions
- Width: 4 Blocks
- Height: 3 Blocks
- Total Gravel: 12 Blocks
🚧 Step 5: Place the Fence Layers
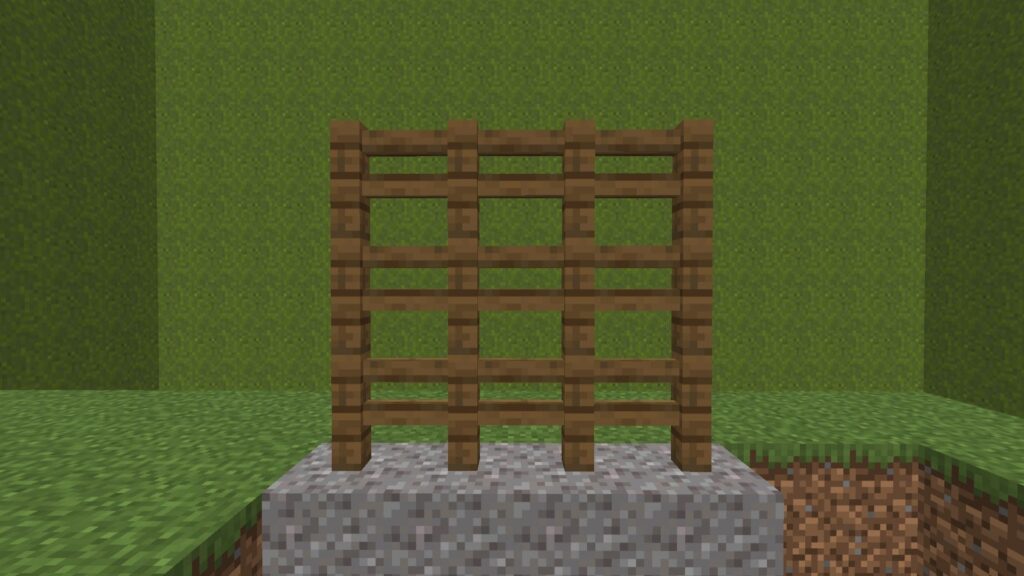
These fences become the visible gate barrier of your Minecraft Automated Castle Gate.
📋 Instructions
✅ Place 4 wooden fences on top of the gravel.
✅ Add a second row of 4 fences.
✅ Add a third row of 4 fences.
📏 Dimensions
- Width: 4 Blocks
- Height: 3 Blocks
- Total Fences: 12
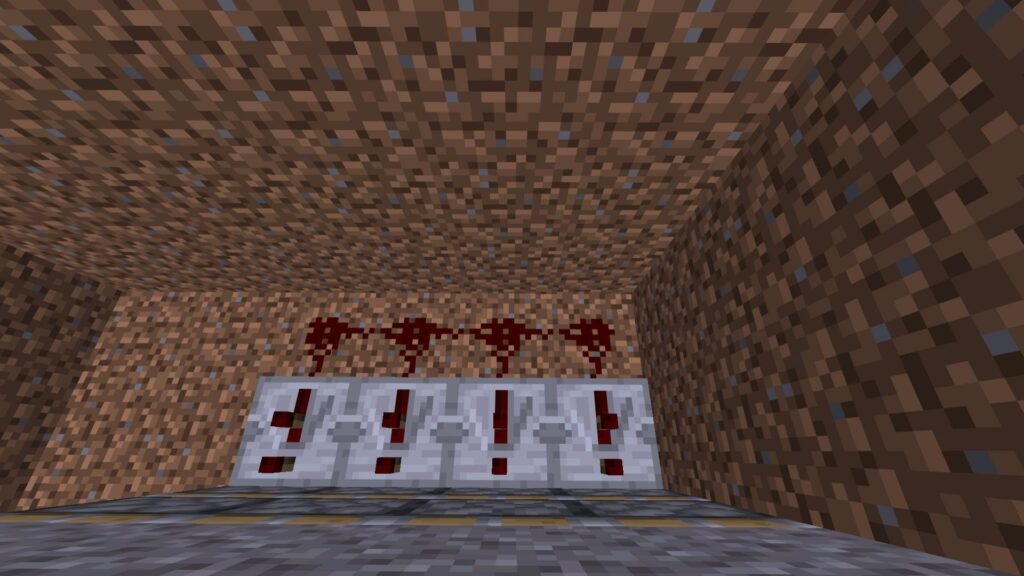
🔴 Step 6: Place and Set Repeaters
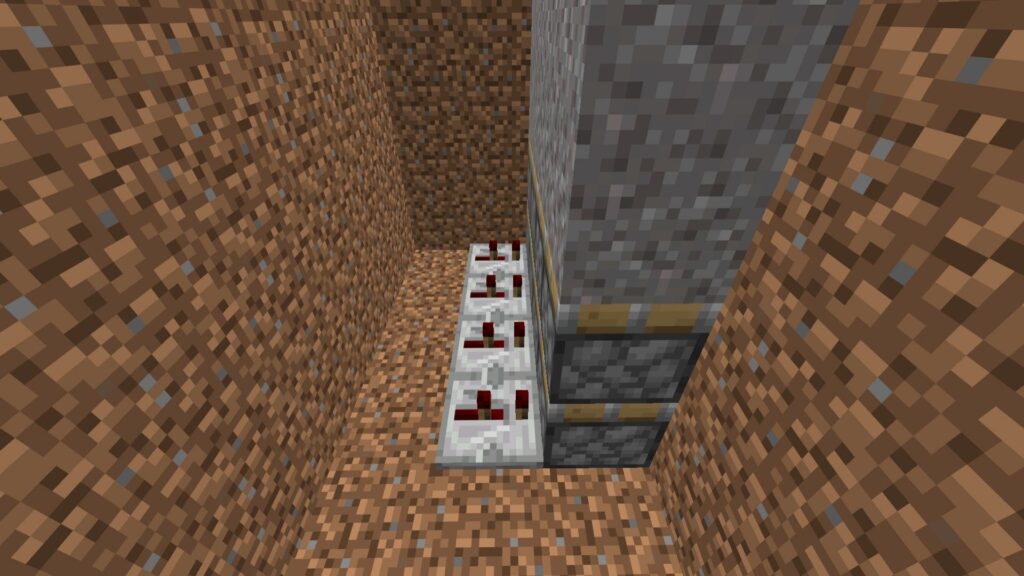
The repeaters control the timing of your Minecraft Automated Castle Gate.
📋 Instructions
✅ Stand behind the sticky pistons.
✅ Place 4 redstone repeaters facing into the pistons.
✅ Right-click each repeater once.
📏 Dimensions
- Length: 4 Repeaters
- Delay: 2 Ticks
⚡ Step 7: Place Redstone Dust Behind Repeaters
Connect the lower circuit of your Minecraft Automated Castle Gate.
📋 Instructions
✅ Place 4 redstone dust behind the repeaters.
✅ Ensure each piece connects to a repeater.
📏 Dimensions
- Length: 4 Blocks
- Width: 1 Block
🧱 Step 8: Add Power Block and Repeater
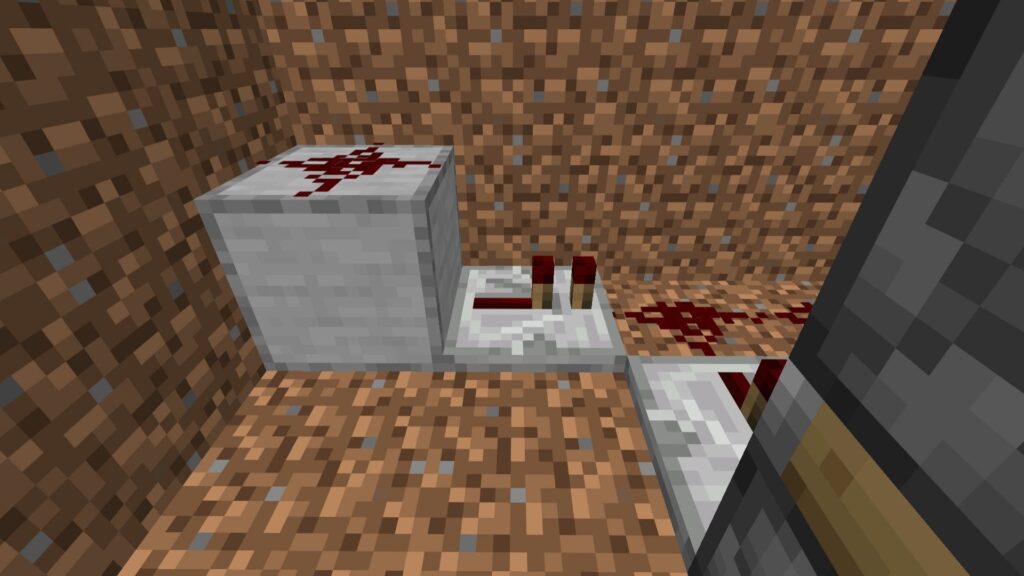
This section carries the signal into the main redstone line.
📋 Instructions
✅ Place 1 smooth stone block in the left corner.
✅ Place 1 redstone dust on top.
✅ Add 1 repeater facing toward the main circuit.
📏 Dimensions
- 1 Smooth Stone Block
- 1 Repeater
🏗️ Step 9: Place the Smooth Stone Platform
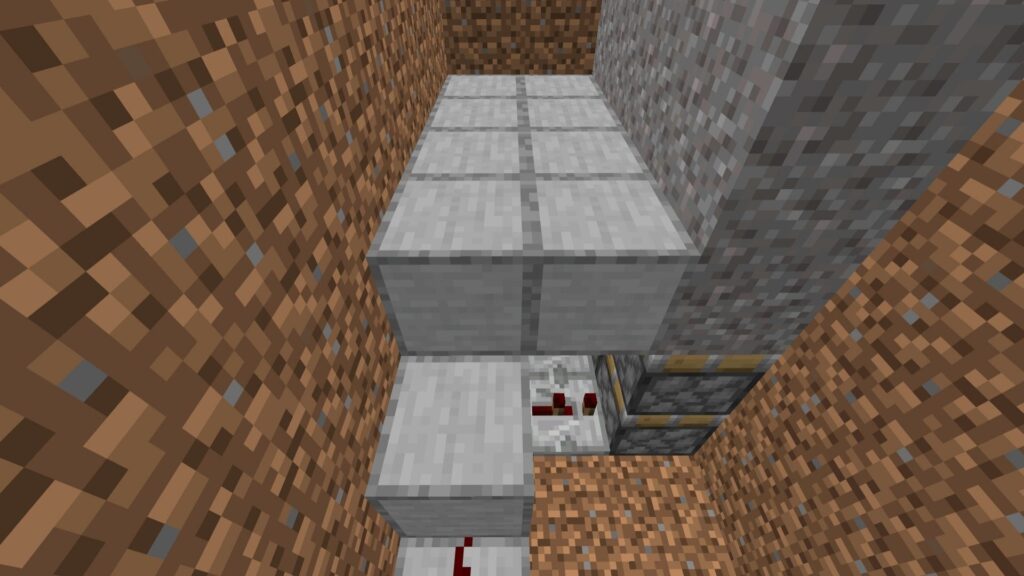
This platform supports the upper wiring of your Minecraft Automated Castle Gate.
📋 Instructions
✅ Place 1 smooth stone block above the repeater.
✅ Extend the platform using 8 more smooth stone blocks.
✅ Keep it level with the first gravel layer.
📏 Dimensions
- Total Blocks: 9
- Height: 2 Blocks
🔄 Step 10: Place the Upper Repeaters
📋 Instructions
✅ Place 4 repeaters in a row.
✅ Face them directly into the second gravel layer.
✅ Leave them at 1 tick.
📏 Dimensions
- Length: 4 Repeaters
- Delay: 1 Tick
⚡ Step 11: Connect Upper Redstone Dust

📋 Instructions
✅ Place 4 redstone dust behind the repeaters.
✅ Place 1 dust on the lower stone step.
✅ Ensure everything connects into one line.
📏 Dimensions
- Total Dust: 5
🧱 Step 12: Place Corner Stepping Blocks
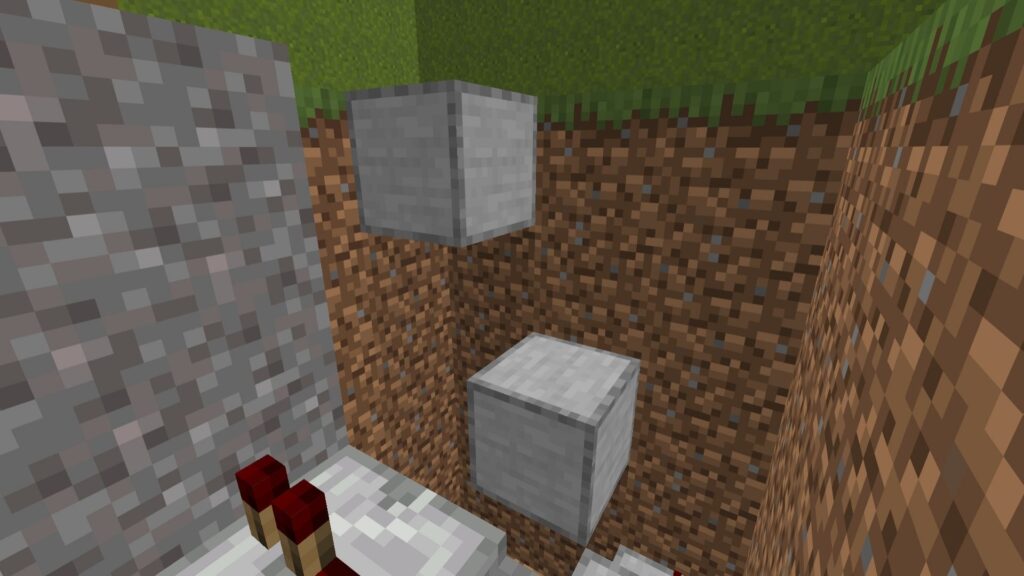
📋 Instructions
✅ Place 1 smooth stone block floating 2 blocks above the floor.
✅ Place another smooth stone block in the corner at ground level.
✅ Create a diagonal staircase effect.
📏 Dimensions
- Lower Block: 2 Blocks High
- Corner Block: Ground Level
🔥 Step 13: Wire the Corner Blocks
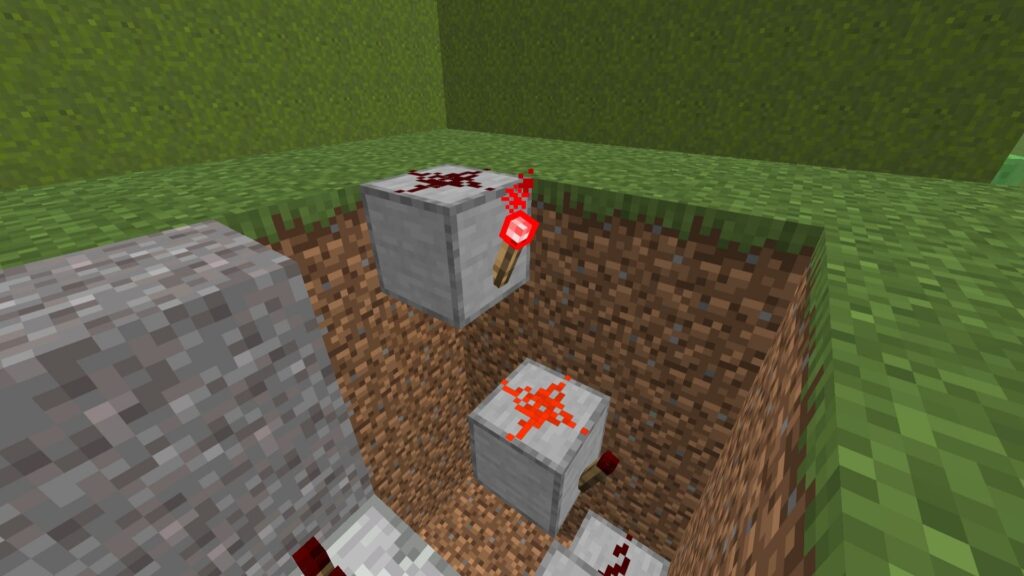
📋 Instructions
✅ Attach a redstone torch to each block.
✅ Place redstone dust on top of both blocks.
📏 Dimensions
- 2 Torches
- 2 Dust
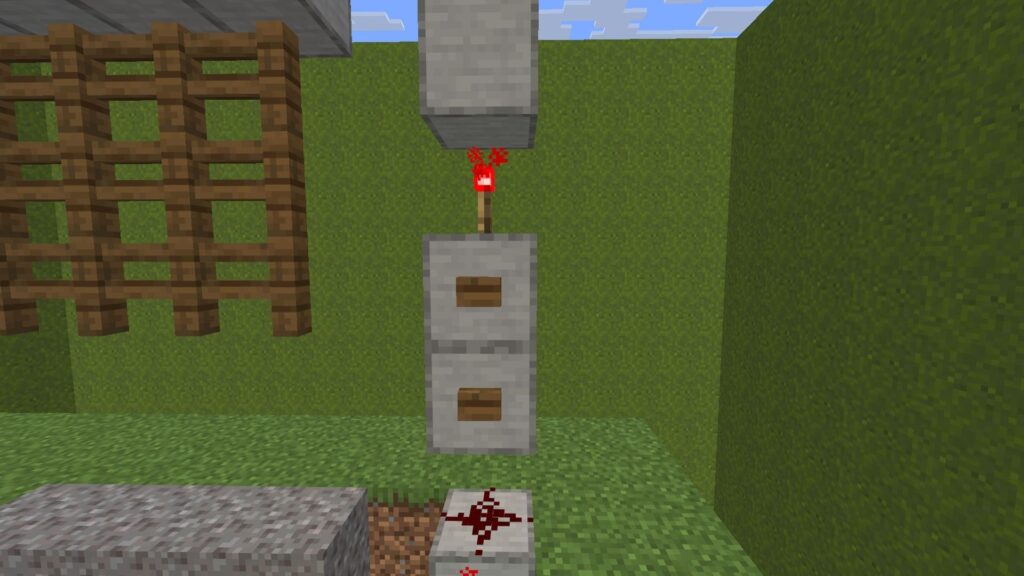
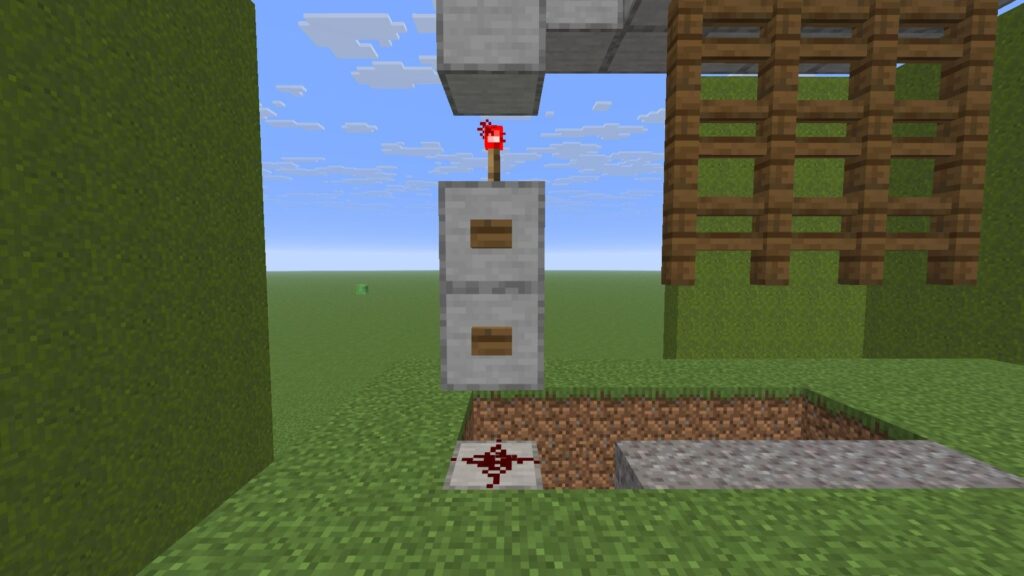
🚀 Step 14: Build a Vertical Torch Tower
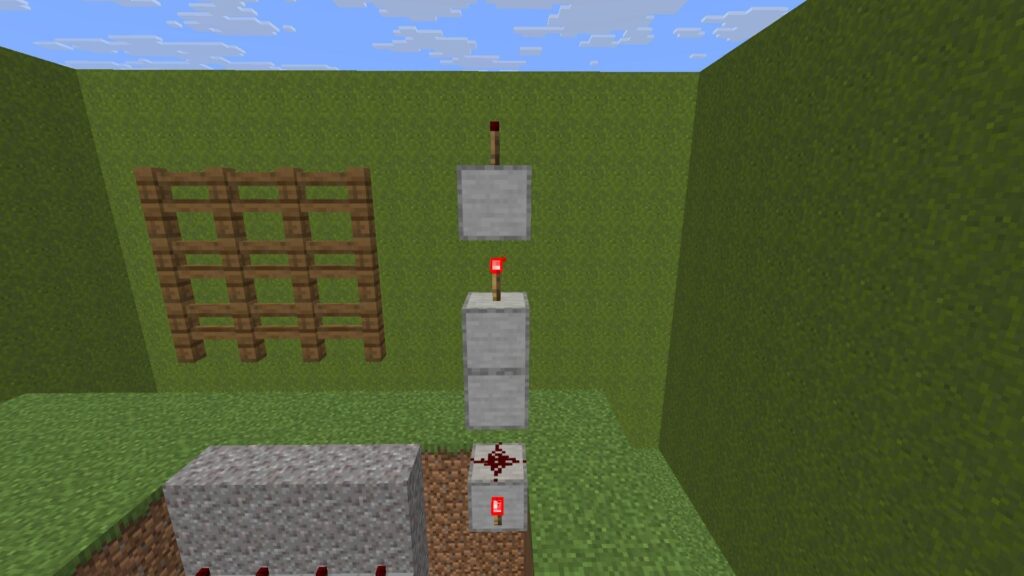
📋 Instructions
✅ Leave a 1-block gap beside the corner setup.
✅ Stack 2 smooth stone blocks vertically.
✅ Add a redstone torch on top.
✅ Place another block above it.
✅ Add a final redstone torch.
📏 Dimensions
- 3 Smooth Stone Blocks
- 2 Redstone Torches
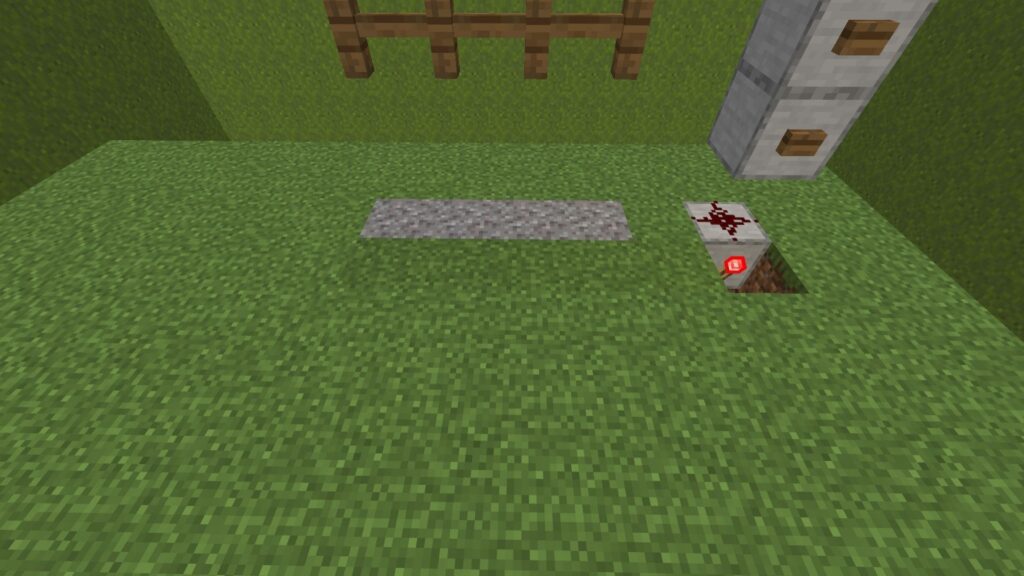
🏰 Step 15: Place Blocks Above the Fence
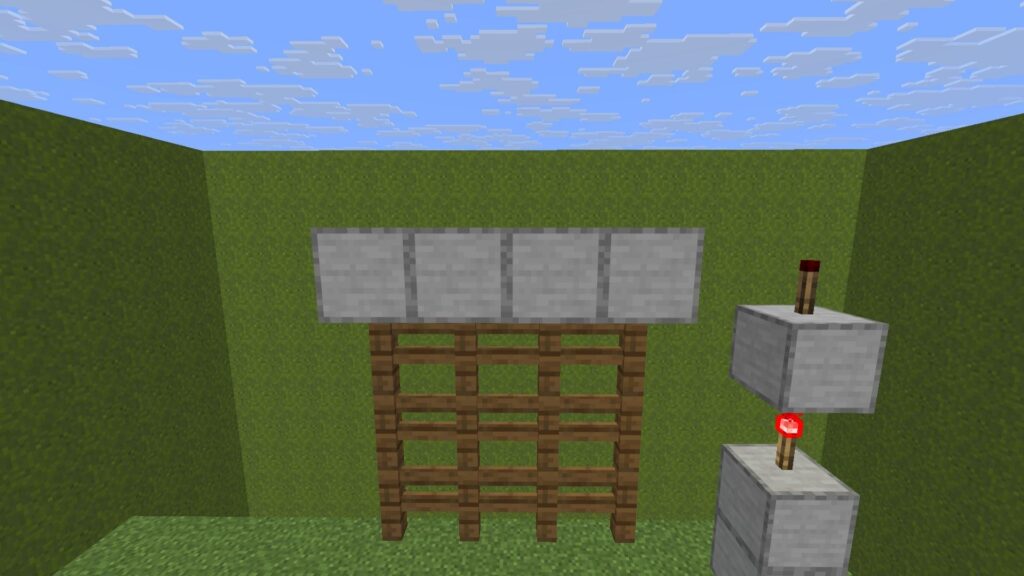
📋 Instructions
✅ Place 4 smooth stone blocks directly above the fences.
✅ Cover the entire width of the gate.
📏 Dimensions
- Length: 4 Blocks
📍 Step 16: Setup a Floating Guide Block
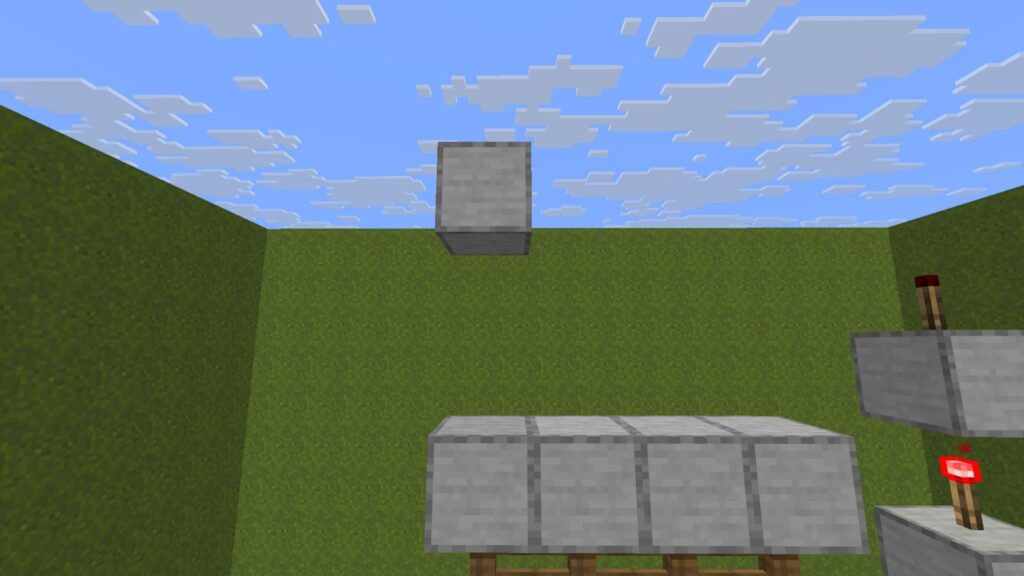
📋 Instructions
✅ Build a temporary 3-block pillar.
✅ Remove the bottom 2 blocks.
✅ Leave the top block floating.
📏 Dimensions
- Floating Height: 2 Blocks Above Stone Layer
⚙️ Step 17: Place Downward-Facing Pistons
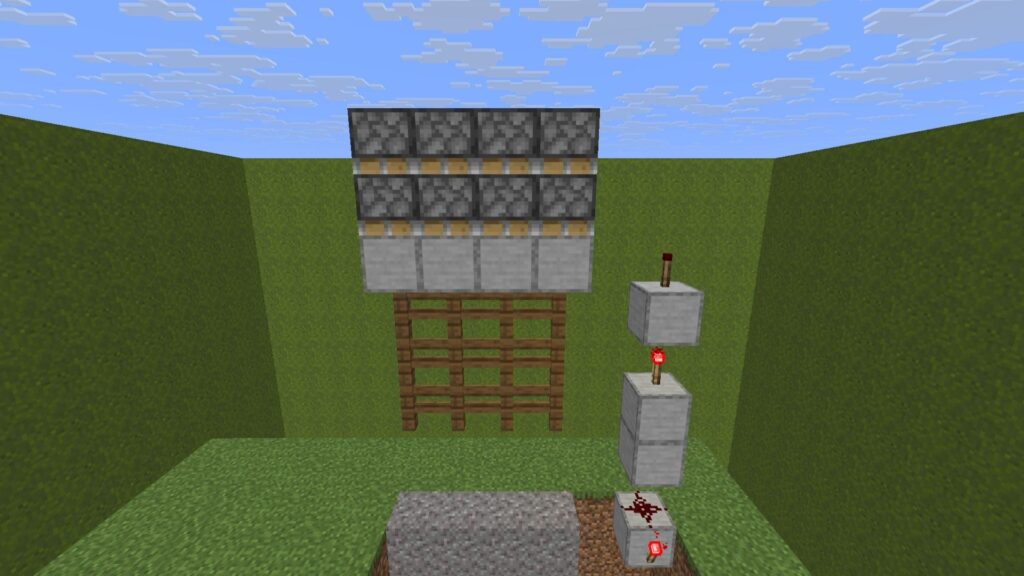
📋 Instructions
✅ Place 4 pistons facing downward.
✅ Place another row of 4 pistons directly above them.
✅ Remove the floating guide block.
📏 Dimensions
- Total Pistons: 8
🧱 Step 18: Add Upper Smooth Stone Layers
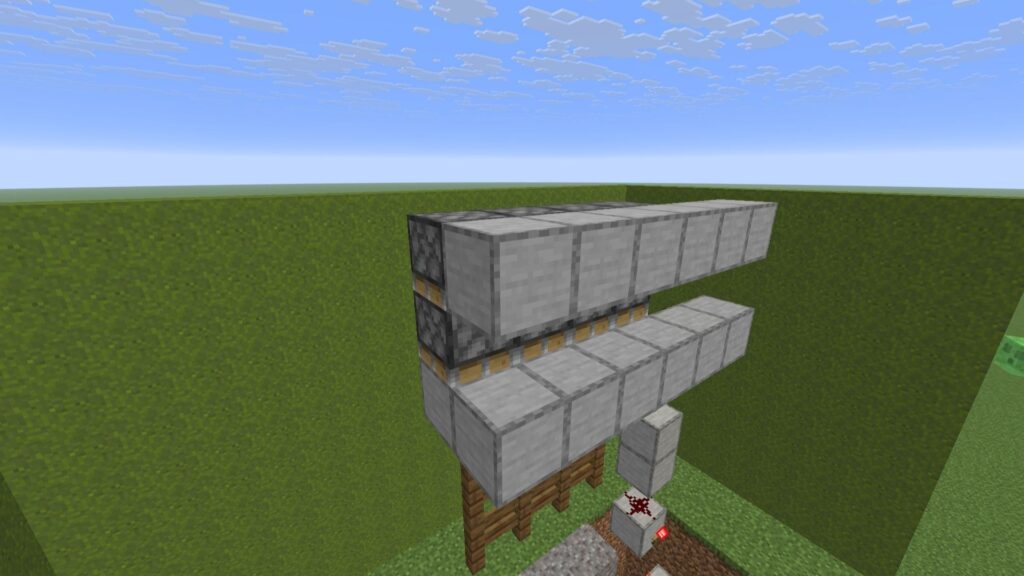
📋 Instructions
✅ Build a row of 6 smooth stone blocks.
✅ Add another row directly above it.
✅ Ensure both rows align.
📏 Dimensions
- Total Blocks: 12
- Row Length: 6
🔴 Step 19: Wire the Upper Stone Layers

📋 Instructions
✅ Place 6 redstone dust on the lower platform.
✅ Place 6 redstone dust on the upper platform.
📏 Dimensions
- Total Dust: 12
⚡ Step 20: Connect Torch Tower to Upper Wiring
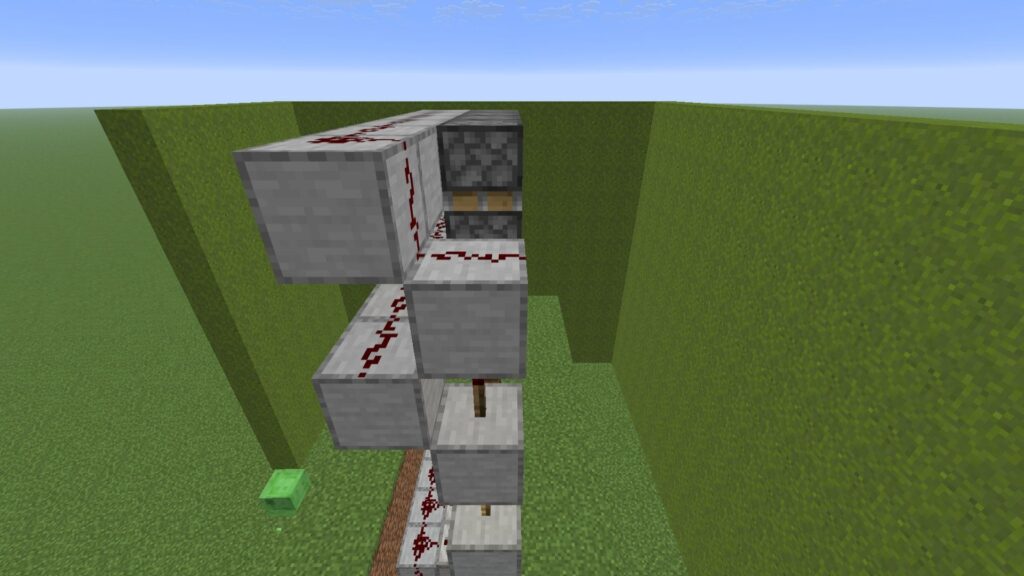
📋 Instructions
✅ Place 1 smooth stone block above the highest torch.
✅ Add 1 redstone dust on top.
✅ Connect it to the nearby line.
📏 Dimensions
- 1 Smooth Stone Block
- 1 Redstone Dust
🔘 Step 21: Add Activation Buttons
📋 Instructions
✅ Place 1 wooden button on the upper block.
✅ Place 1 wooden button on the lower block.
✅ Test both buttons.
📏 Dimensions
- Total Buttons: 2
🔘 Step 22: Add Opposite Activation Buttons
📋 Instructions
✅ Move to the opposite side.
✅ Place 1 button on the upper block.
✅ Place 1 button on the lower block.
📏 Dimensions
- Total Buttons: 2
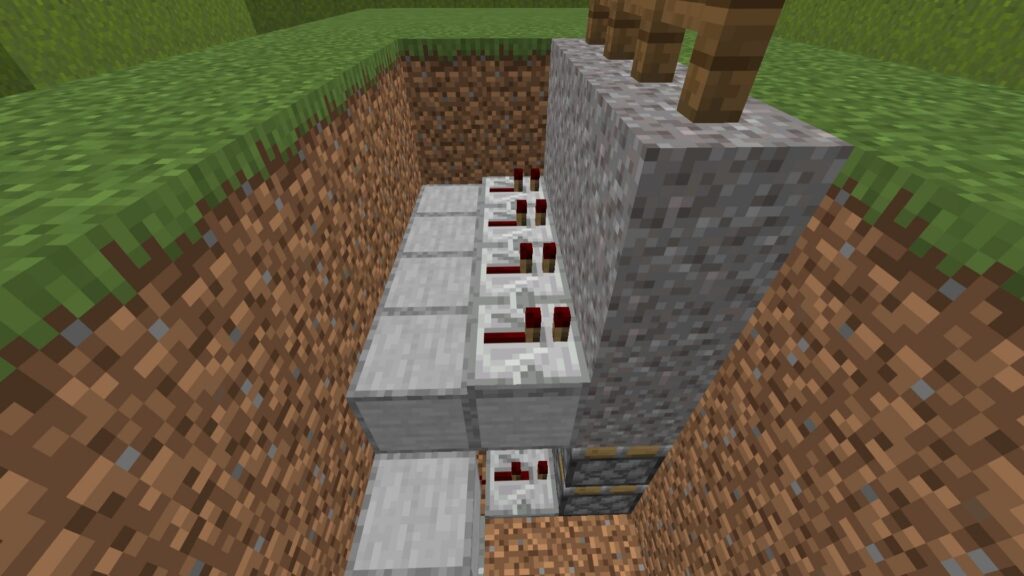
🌱 Step 23: Cover the Lower Circuit System
📋 Instructions
✅ Fill all trenches with grass blocks.
✅ Level the ground completely.
✅ Keep critical connections accessible.
🎯 Result
Your Minecraft Automated Castle Gate now has hidden wiring for a clean appearance.
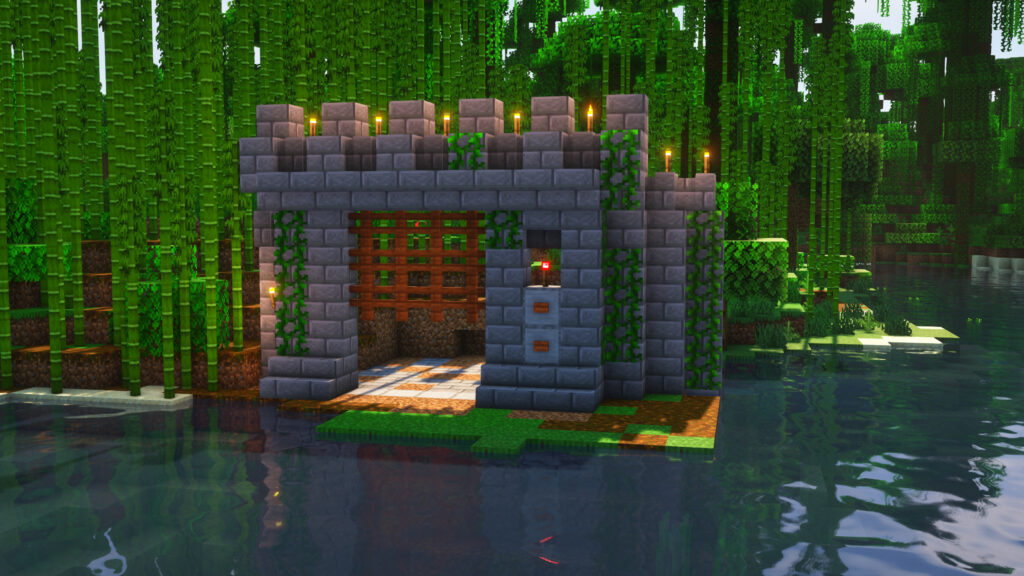
👑 Step 24: Decorative Final Look
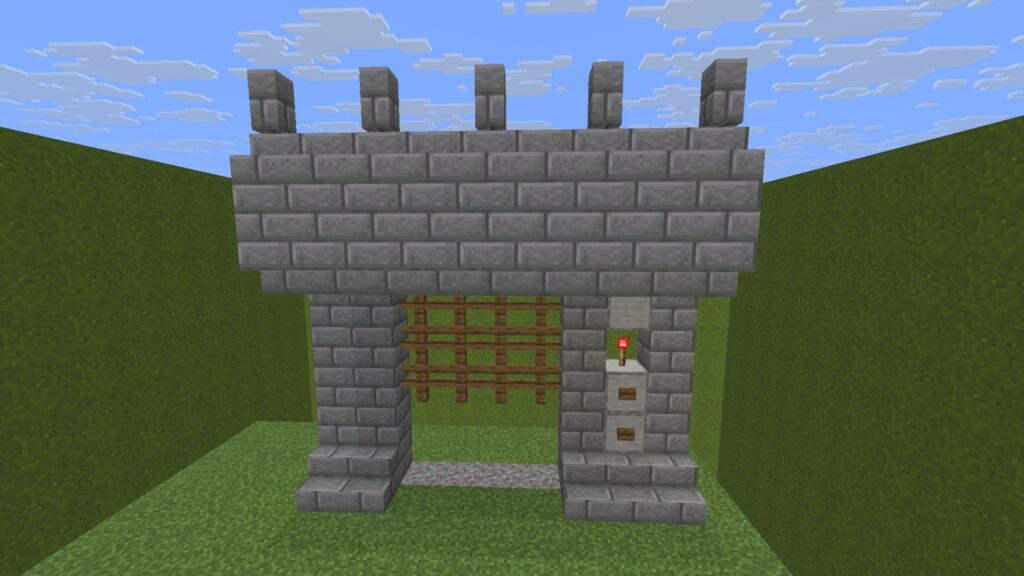
Now transform your working Minecraft Automated Castle Gate into a beautiful fortress entrance.
📋 Instructions
✅ Build thick stone brick pillars.
✅ Add a heavy stone bridge above the gate.
✅ Place stone brick stairs around the entrance.
✅ Add castle walls and crenellations.
🎯 Result
A fully finished Minecraft Automated Castle Gate that looks like a true medieval fortress entrance.
💡 Minecraft Automated Castle Gate Tips
🔘 Use Stone Buttons
Blend controls naturally into castle walls.
🏹 Build a Watch Tower
Safely monitor approaching visitors and mobs.
⛓️ Upgrade the Gate Design
Replace fences with:
- Iron Bars ⚔️
- Nether Brick Fences 🔥
- Deepslate Blocks ⬛
❌ Common Minecraft Automated Castle Gate Problems
🚫 Gate Not Moving
✅ Check repeater directions.
✅ Verify all redstone connections.
✅ Inspect the torch tower.
💥 Gate Breaking
✅ Make sure fences are not catching on nearby blocks.
✅ Verify all wiring is symmetrical.
✅ Use buttons instead of levers or pressure plates.
🚀 What Can Your Minecraft Automated Castle Gate Do?
🛡️ Protect Your Fortress
Keep hostile mobs and enemy players outside your base.
🎬 Create a Grand Entrance
Open and close a massive fortress gate with a single button press.
🏰 Improve Castle Realism
A Minecraft Automated Castle Gate instantly upgrades the appearance of any medieval build.
⚙️ Showcase Redstone Engineering
Demonstrate advanced redstone skills with a hidden, fully automated security system.